Introduction
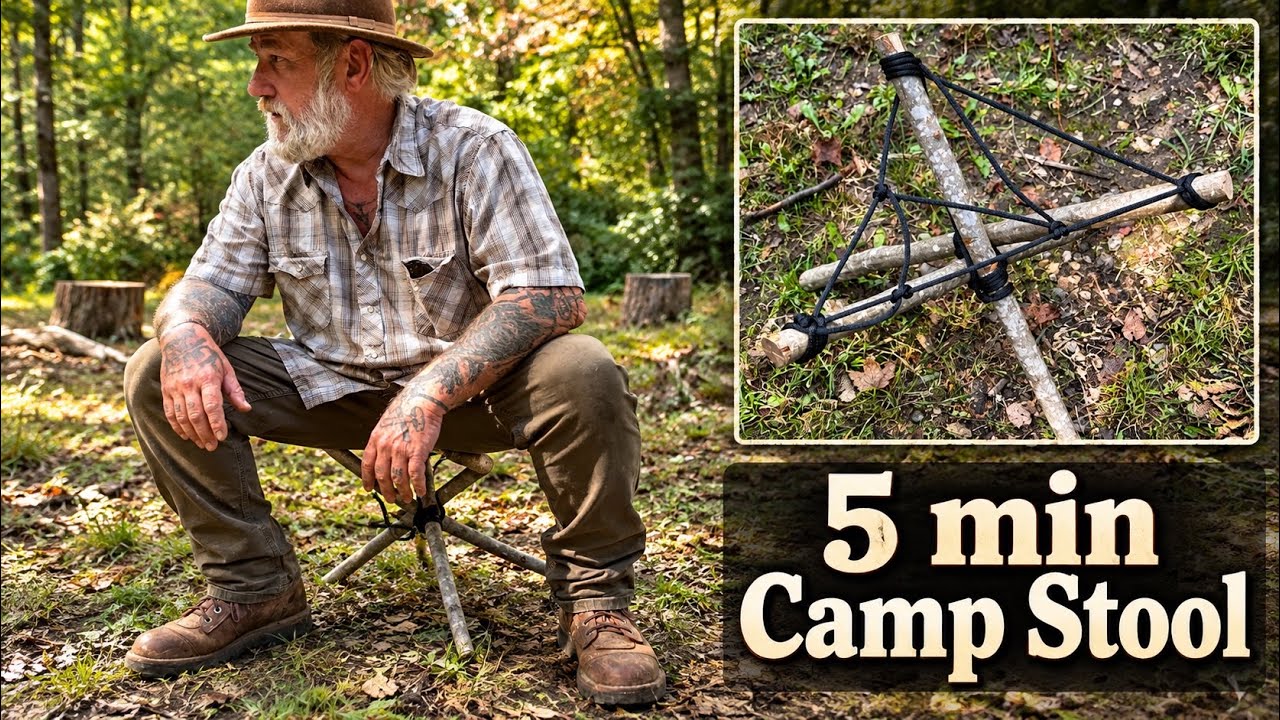
After a long day of building camp, processing firewood, and setting up your shelter, having a place to sit down is not a luxury. It is a morale booster that can make the difference between a miserable outing and a comfortable one. In this bushcraft walkthrough, renowned survival instructor Dave Canterbury of the Pathfinder School demonstrates how to build a simple, functional camp stool using nothing more than sticks, cordage, and a few minutes of your time.
The beauty of this project lies in its simplicity. You do not need specialized tools or expensive gear. Whether you are setting up a long-term wilderness camp or just want a seat for the evening fire, this DIY camp stool project teaches fundamental bushcraft skills like cordage wrapping, frame construction, and load-bearing design. Dave walks through each step, from selecting the right sticks to assembling the frame and seat, then puts the finished stool to use in the field.
Beyond the obvious comfort benefit, building camp furniture from natural materials deepens your understanding of wood selection, structural design, and cordage work. These are the same foundational skills you will use for constructing drying racks, pot hangers, tripods, and improvised shelters. When you can fashion a sturdy seat from what the forest provides, you are well on your way to true self-sufficiency in the wild.
Why a Camp Stool Belongs in Your Bushcraft Kit
Most beginners focus on fire, water, and shelter, and rightly so. But camp comfort is an often-overlooked aspect of sustained outdoor living. Sitting on the ground for extended periods leads to back pain, cold exposure from ground contact, and reduced circulation in your legs. A simple stool gets you off the ground, keeps you warmer, and lets you work on tasks like carving, cooking, or gear repair at a comfortable height. In a survival situation, conserving energy and maintaining morale are just as important as any other skill you possess.
The camp stool also serves as an excellent teaching tool for cordage work. The lashing techniques Dave demonstrates, including notching, wrapping, and tensioning, are the same methods used in tripod construction, shelter frameworks, and even improvised tool handles. Master this small project and you have taken a meaningful step toward competent camp craft. Once you understand how to join sticks with cordage under tension, an entire world of camp furniture and field equipment opens up to you, from drying racks to pot suspension systems over your fire.
Step-by-Step Build Guide
While the video shows the full process, here is a quick breakdown so you can visualize each stage before you start:
- Gather your materials: Find three sturdy, straight sticks of similar length and diameter for the legs, plus a crossbar or two for the seat frame. Green wood from freshly cut branches is ideal because it is flexible and resists splitting.
- Cut to length: Use your knife or saw to trim the sticks to a consistent length. A seat height of 12 to 16 inches works well for most adults.
- Notch the joints: Cut small grooves where the sticks will intersect. These notches give the cordage a channel to sit in, preventing slippage under body weight.
- Lash the tripod base: Arrange the three legs in a tripod formation and wrap the junction tightly with paracord or natural cordage. Use a tripod lashing for maximum stability.
- Attach the seat frame: Lash a crossbar across two of the legs at seat height, then weave or attach your seat material, whether it is paracord webbing, a piece of leather, or woven cordage.
- Tension and test: Pull the seat material tight and secure it. Sit on the stool gently to test stability, then adjust if needed.
Key Survival Takeaways
- Material selection matters: Choose straight, sturdy sticks of similar diameter for the legs and frame. Green wood from freshly cut branches works well because it is flexible and resists splitting when you notch it. Avoid brittle dead wood that can snap under load.
- Cordage is your best friend: The entire stool is held together with cordage wraps, with no nails, screws, or adhesives needed. Learning proper lashing and wrapping techniques is one of the most versatile skills in bushcraft. The same knots and wraps used here apply directly to shelter building, tripod construction, and tool handle wrapping.
- Notching for stability: Cutting small notches where sticks intersect gives the cordage a groove to sit in, preventing slippage under weight. This simple technique dramatically increases the structural integrity of any cordage-lashed project and is worth practicing on every build.
- The tripod base design: A three-legged stool is naturally stable on uneven ground because all three legs will always make contact, even on rocky or sloped terrain. This is why tripod designs are favored in wilderness settings over four-legged furniture, which can wobble on irregular surfaces.
- Seat tension is critical: The seat material, whether cordage webbing, a piece of leather, or woven paracord, needs to be pulled tight and secured properly. A loose seat sags and becomes uncomfortable quickly. A properly tensioned seat distributes your weight evenly across the frame and holds up over repeated use.
- Practice builds speed: Dave calls this a five-minute project, but that speed comes from repetition. Build a few of these at home before you need one in the field, and you will be able to assemble one quickly under real camp conditions, even in low light or poor weather.
- Adapt to available materials: The stool design is inherently flexible. If you do not have the exact stick lengths shown, adjust the dimensions to what is available. The principles of notching, lashing, and tensioning remain the same regardless of the size of your finished stool.
Common Mistakes to Avoid
- Using dead, brittle wood: Dead branches may look sturdy but often snap under body weight, especially at notched joints. Always test-flex a stick before committing to it as a leg.
- Skipping the notches: It is tempting to rush and lash without notching, but cordage will slip and the stool will collapse. Take the extra minute to cut grooves at every joint.
- Over-tightening cordage: While tension is important, wrapping so tightly that you crush the wood fibers weakens the sticks. Find the balance between snug and destructive.
- Ignoring seat height: A stool that is too low is uncomfortable and hard to stand up from. One that is too tall is tippy. Aim for 12 to 16 inches for most adults.
- Forgetting to field-test: Always sit gently on a new build before trusting it fully. Better to discover a loose lashing at a low height than to drop suddenly in the field.
Gear and Equipment
Building a camp stool requires minimal gear, but having the right cordage and a reliable cutting tool makes the job much easier. Here are some essential items for this project and similar bushcraft builds:
- 550 Paracord Type III — Versatile cordage perfect for lashing, wrapping, and seat weaving. Its seven inner strands can also be extracted for finer work.
- Bushcraft Fixed Blade Knife — Essential for notching sticks, processing cordage, and carving. A full-tang knife with a scandi grind handles these tasks with precision.
- Natural Jute Twine — A biodegradable cordage option for more traditional bushcraft builds. It blends with the natural environment and holds knots well when moistened.
- Pocket Chain Saw — A compact saw for cutting thicker branches to size when a knife is not enough. Fits in any pack and makes quick work of green wood.
- Folding Camp Stool — A manufactured alternative for when you cannot or do not want to build one in the field. Lightweight and packs flat for backpacking.
As an Amazon Associate, we earn from qualifying purchases.
Conclusion
Dave Canterbury’s five-minute camp stool is more than just a place to sit. It is a lesson in resourcefulness that pays off in comfort and skill. Every stick you notch and every wrap of cordage reinforces techniques that transfer directly to shelter building, tool making, and general camp craft. The next time you are in the woods with a few spare sticks and some paracord, take five minutes to build your own. Your back will thank you, and your bushcraft skills will be sharper for it.